Deploy openstack(devstack) on EC2
EC2 인스턴스에 테스트용 Openstack 설치
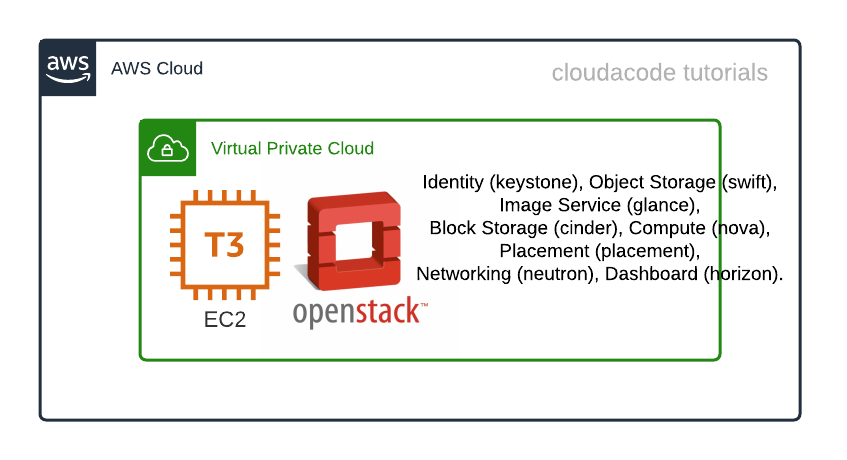
이번 실습은 DevStack(테스트용 Openstack)을 EC2에 설치하고 Horizon 대시보드를 통해 Openstack의 기본 리소스(컴퓨팅, 스토리지, 네트워크 등)를 배포하고 이해 할 수 있습니다.
Time to Complete: 1-2 hours
Tutorial Prereqs:
- An AWS Account and PowerUser-level access to it
- Ubuntu 20.04, t3.xlarge, Spot, 50GB EC2 Instance
System Architecture

1. Create stack user
sudo useradd -s /bin/bash -d /opt/stack -m stack
echo "stack ALL=(ALL) NOPASSWD: ALL" | sudo tee /etc/sudoers.d/stack
sudo -u stack -i
2. Download Devstack
sudo apt update
sudo apt install git -y
git clone https://opendev.org/openstack/devstack
cd devstack/
3. Install Devstack
Update config file
DevStack의 Password 파일 설정 local.conf
cat <<EOF > local.conf
[[local|localrc]]
ADMIN_PASSWORD=cloudacode
DATABASE_PASSWORD=cloudacode
RABBIT_PASSWORD=cloudacode
SERVICE_PASSWORD=cloudacode
EOF
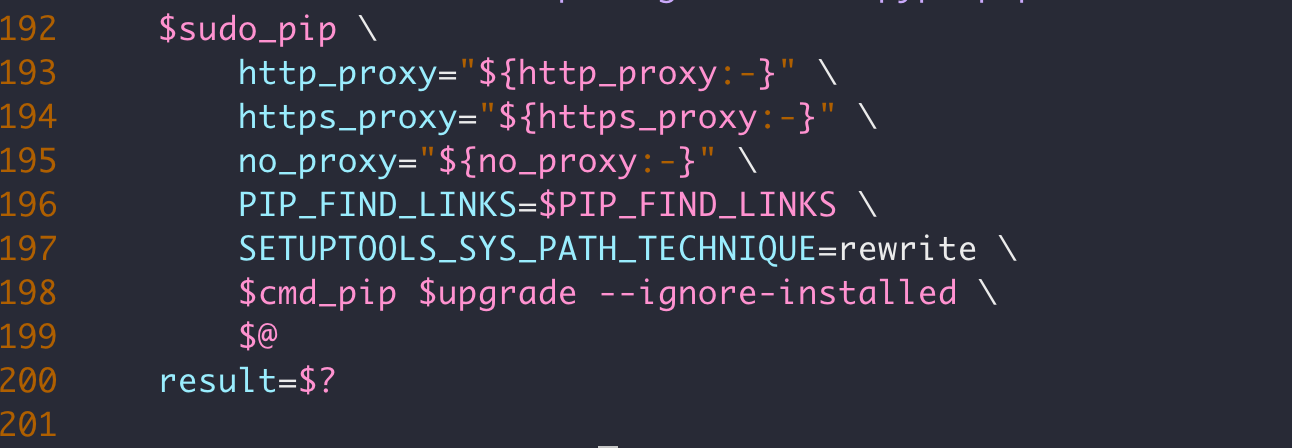
설치과정 중 python pip module upgrade시에 발생하는 경고 메시지를 무시하기 위해 inc/python 파일 일부를 수정, 198번째 라인에 아래 옵션 추가
--ignore-installed
Install devstack
using stack.sh to install devstack.
./stack.sh
Warning
will take a 15-20 minutes to install a lot of dependencies
정상적으로 완료가 되면 다음과 같은 메시지를 확인 할 수 있다.
=================
 Async summary
=================
 Time spent in the background minus waits: 342 sec
 Elapsed time: 1369 sec
 Time if we did everything serially: 1711 sec
 Speedup:  1.24982

This is your host IP address: 172.31.2.38
This is your host IPv6 address: ::1
Horizon is now available at http://172.31.2.38/dashboard
Keystone is serving at http://172.31.2.38/identity/
The default users are: admin and demo
The password: cloudacode

Services are running under systemd unit files.
For more information see:
https://docs.openstack.org/devstack/latest/systemd.html

DevStack Version: xena
OS Version: Ubuntu 20.04 focal
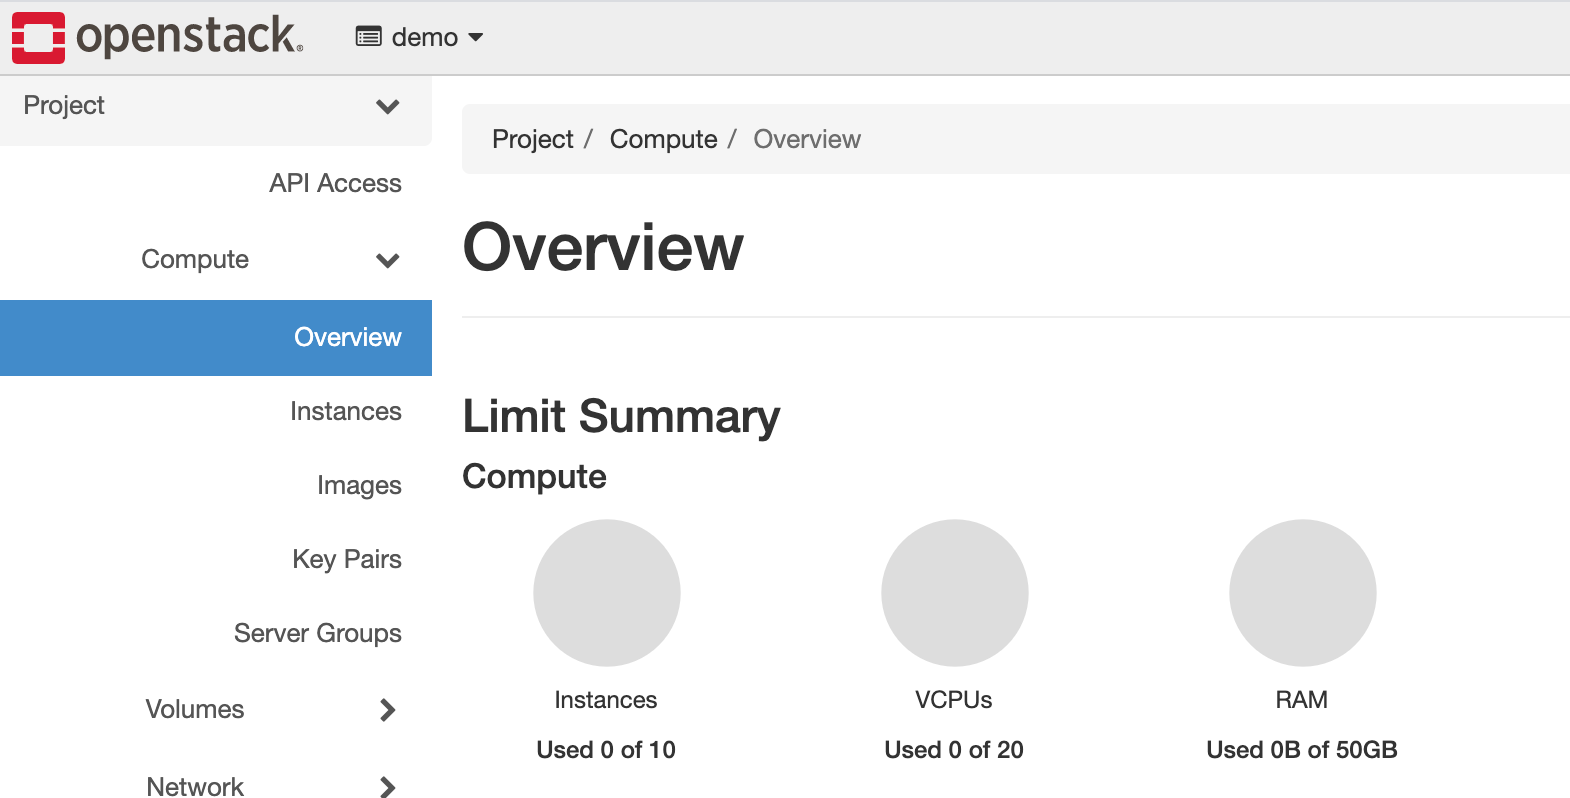
4. Access Openstack dashboard
EC2 콘솔
에서 Public IPv4 address 확인 혹은 리눅스 커멘드로 curl ifconfig.me 후 해당 IP에 HTTP로 접속 및 페이지 확인
Note
ID: admin, PW: cloudacode
5. Create an instance
6. Manage the instance
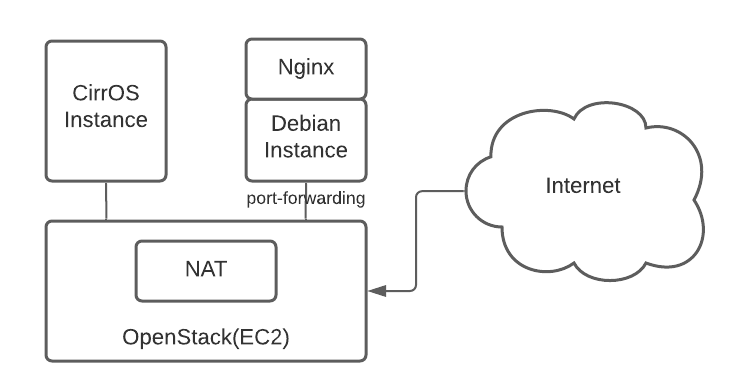
#Enable NAT for the instance network(02:35)
sudo iptables -t nat -A POSTROUTING -o ens5 \
-s 172.24.4.0/24 -j MASQUERADE

#Config port forward rule to expose network(24:35)
sudo iptables -t nat -A PREROUTING -p tcp -i ens5 \
--dport 8000 -j DNAT --to-destination 172.24.4.185:8000
🎉 Congratulations, you have completed Openstack tutorial
이 글이 유용하였다면 ⭐ Star를, 💬 1:1 질문이나 기술 관련 문의가 필요하신 분들은 클라우드어코드 카카오톡 채널 추가 부탁드립니다.🤗